- ホーム
- お役立ち
- Google Service
- 【第7回】 Cloud Storage for Firebase セキュリティとルール【はじめてみよう Firebase】
【第7回】 Cloud Storage for Firebase セキュリティとルール【はじめてみよう Firebase】
- Cloud Storage for Firebase
- Firebase
- セキュリティ

前回は、 Cloud Storage for Firebase にファイルを保存し、情報を取得するという操作をしましたが、 実際は情報の取得だけでなく、画像や動画などのコンテンツデータのダウンロードやアップロードなどの操作が必要になります。
その際に、データにアクセスするのが誰かを検証し、許可したユーザにだけアクセスさせたいとか、アップロードできるユーザを制限したいなどのユーザーのアクセス権限を管理する必要があります。
Cloud Storage for Firebase には、 Firebase Authentication と連携してアクセス制御をする機能が用意されています。
今回は、 Cloud Storage for Firebase のセキュリティルールの設定と、 Firebase Authentication と連携したアクセス制限の仕方について説明します。
目次
この記事の目的
- Cloud Storage for Firebase のセキュリティルールを理解する
- Firebase Authentication と連携してファイルのアクセス制御をする
Cloud Storage for Firebase のセキュリティルール
Cloud Storage for Firebase のセキュリティ ルールは Firebase Authentication と連携してユーザーベースのセキュリティを実現します。
Firebase コンソールに用意されている [ルール] 画面から、認証(ユーザーは誰なのか)と承認(ユーザーは何を実行できるのか)の設定を簡単にすることができます。
セキュリティルールは、Firebase コンソールの [Storage] セクションの [ルール] タブを表示して編集できます。
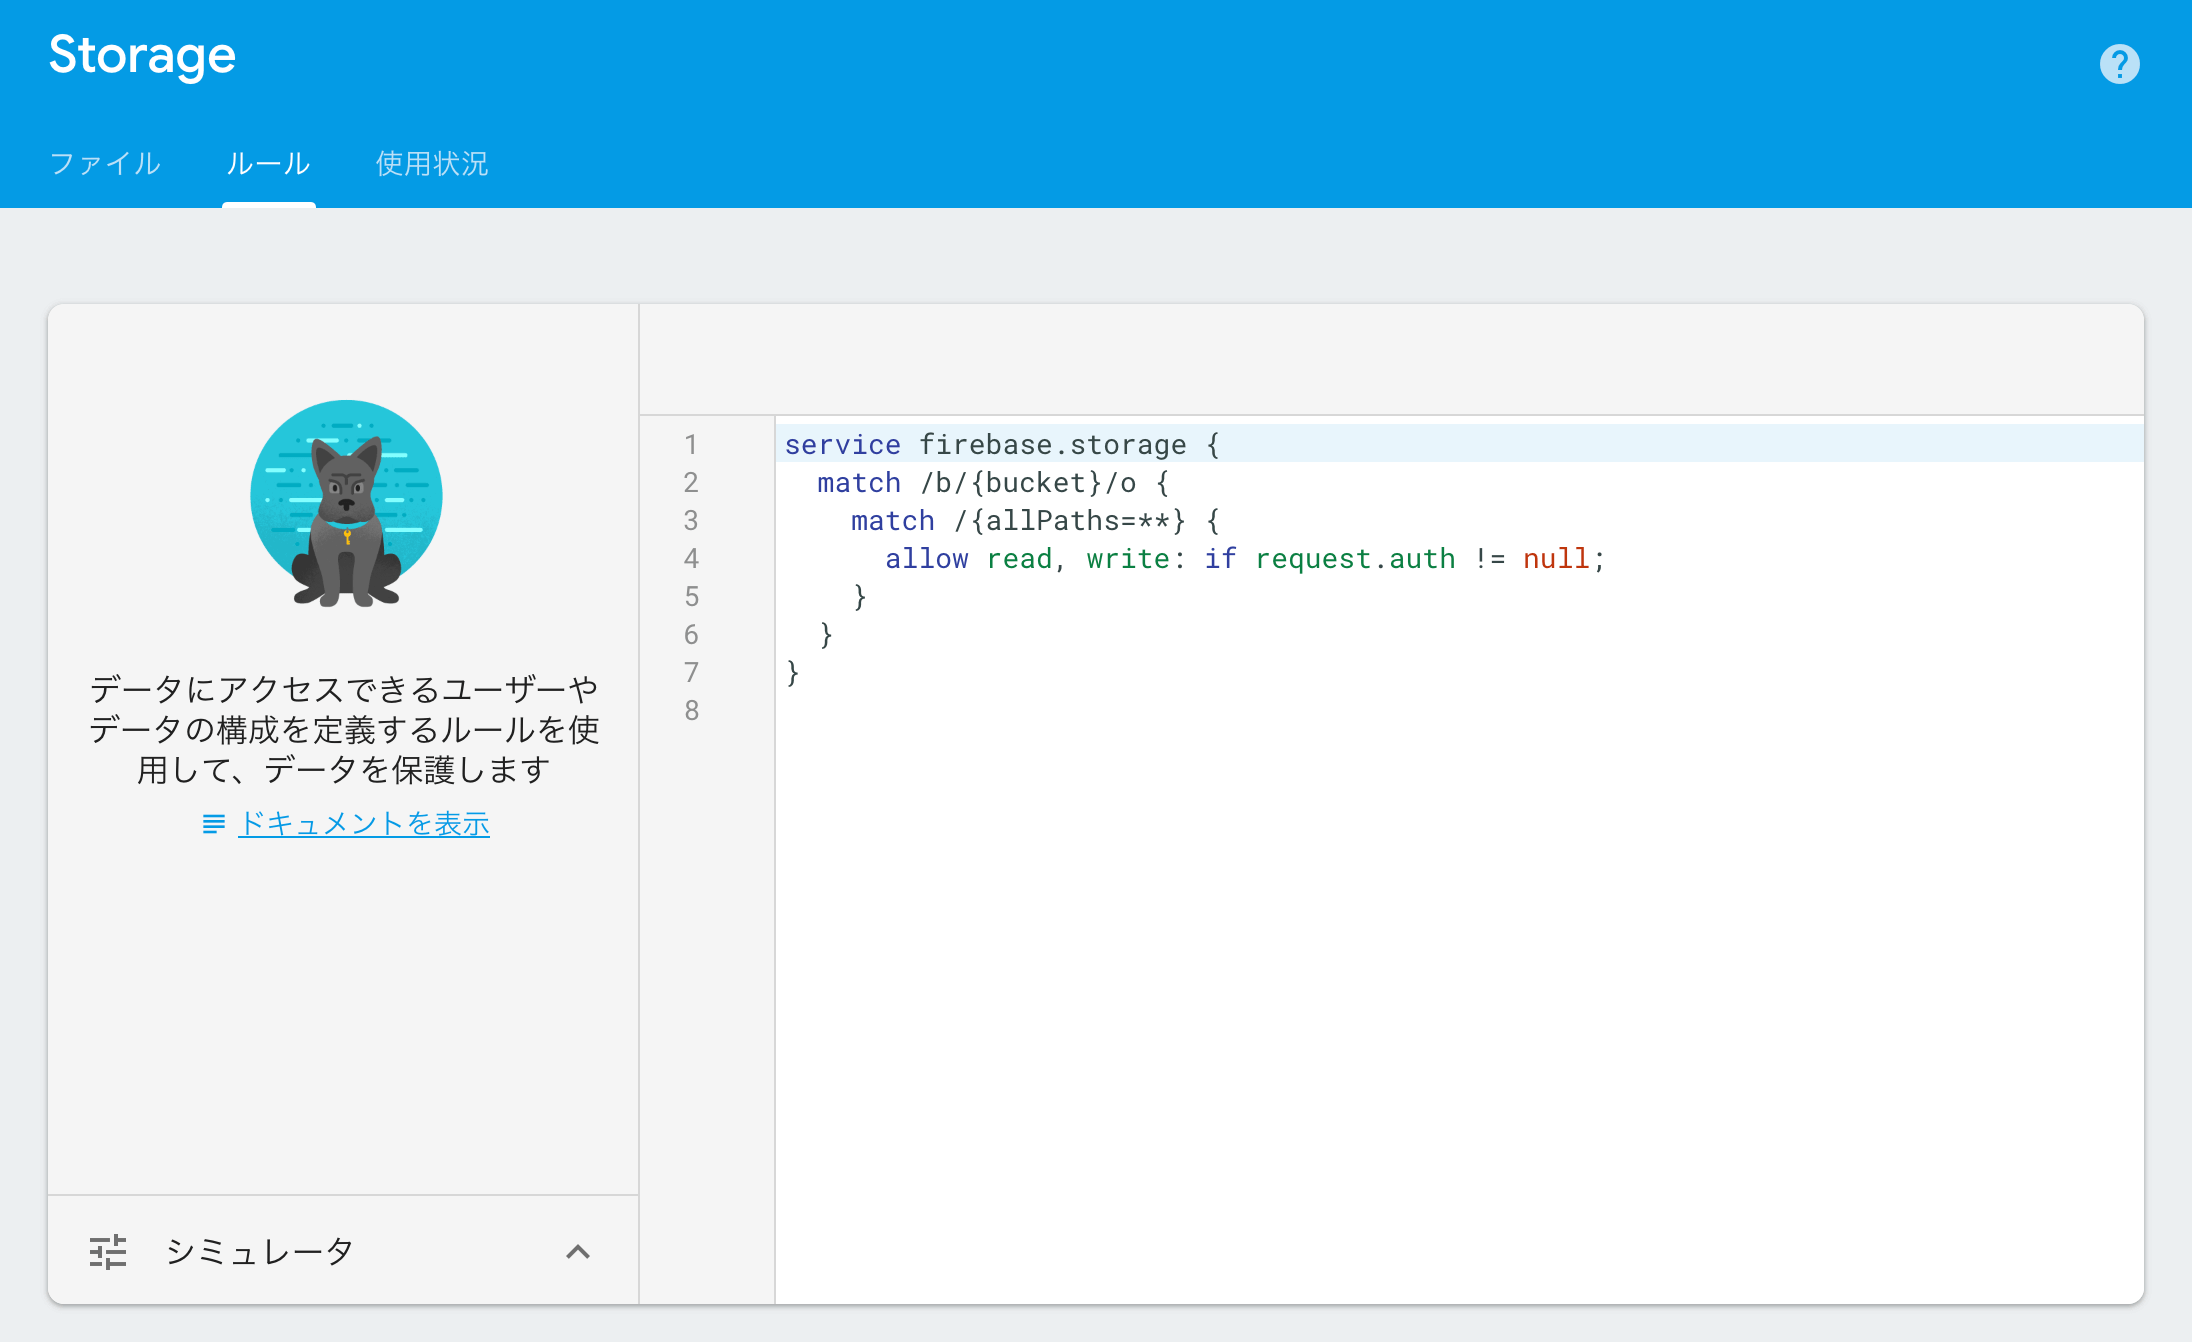
セキュリティルールは、Cloud Storage に格納されているデータに、ユーザーがどんなアクセス権を持っているかを設定します。
データには、バケット、フォルダ、ファイルを指定することができ、アクセス権には、読み取り権限と書き込み権限を指定することができます。
ユーザには、特定のユーザーやユーザーグループ、認証なしの公開モードまで幅広く設定することができ非公開にすることもできます。
設定には独特の構文を使いますが、それほど複雑ではありません。
以下の例では Firebase Authentication で認証済のユーザであれば全てのバケットとファイルの読み取り権と書き込み権を持っています。
service firebase.storage {
  match /b/{bucket}/o {
    match /{allPaths=**} {
      allow read, write: if request.auth != null;
    }
  }
}
以下の例は、 user1@example.com のみ、 myPhoto.png ファイルの読み取り権限を持っています。
ファイルや、バケットは mach の後に入れ子にしてパスを指定することができます。ここでは、 {bucket}/images/myPhoto.png のパスをそれぞれ入れ子にして指定しています。
service firebase.storage {
  match /b/{bucket}/o {
      // Partial match for files that start with "images"
    match /images {
      // Exact match for "images/profilePhoto.png"
      match /myPhoto.png {
        allow read;
      }
    }
  }
}
Firebase Authentication と連携する
それでは、実際に Firebase Authentication と連携して、 Cloud Storage for Firebase のアクセス制限をかけてみましょう。
ここでは、公開画像と限定公開画像の2つのファイルを用意して、一つは誰でもアクセスできるようにし、もう一つは特定ユーザのみがアクセスできるようにします。
アプリケーションは前回作成したものに認証機能やルールの設定などの機能を追加して作成します。
手順は概ね次のとおりです。
- Firebase Authentication を設定する
- ファイルをアップロードする
- ルールを設定する
- HTMLとJavascriptを修正する
Firebase Authentication を設定する
こちらの記事を参考にして、限定公開画像にアクセスできるユーザを作成します。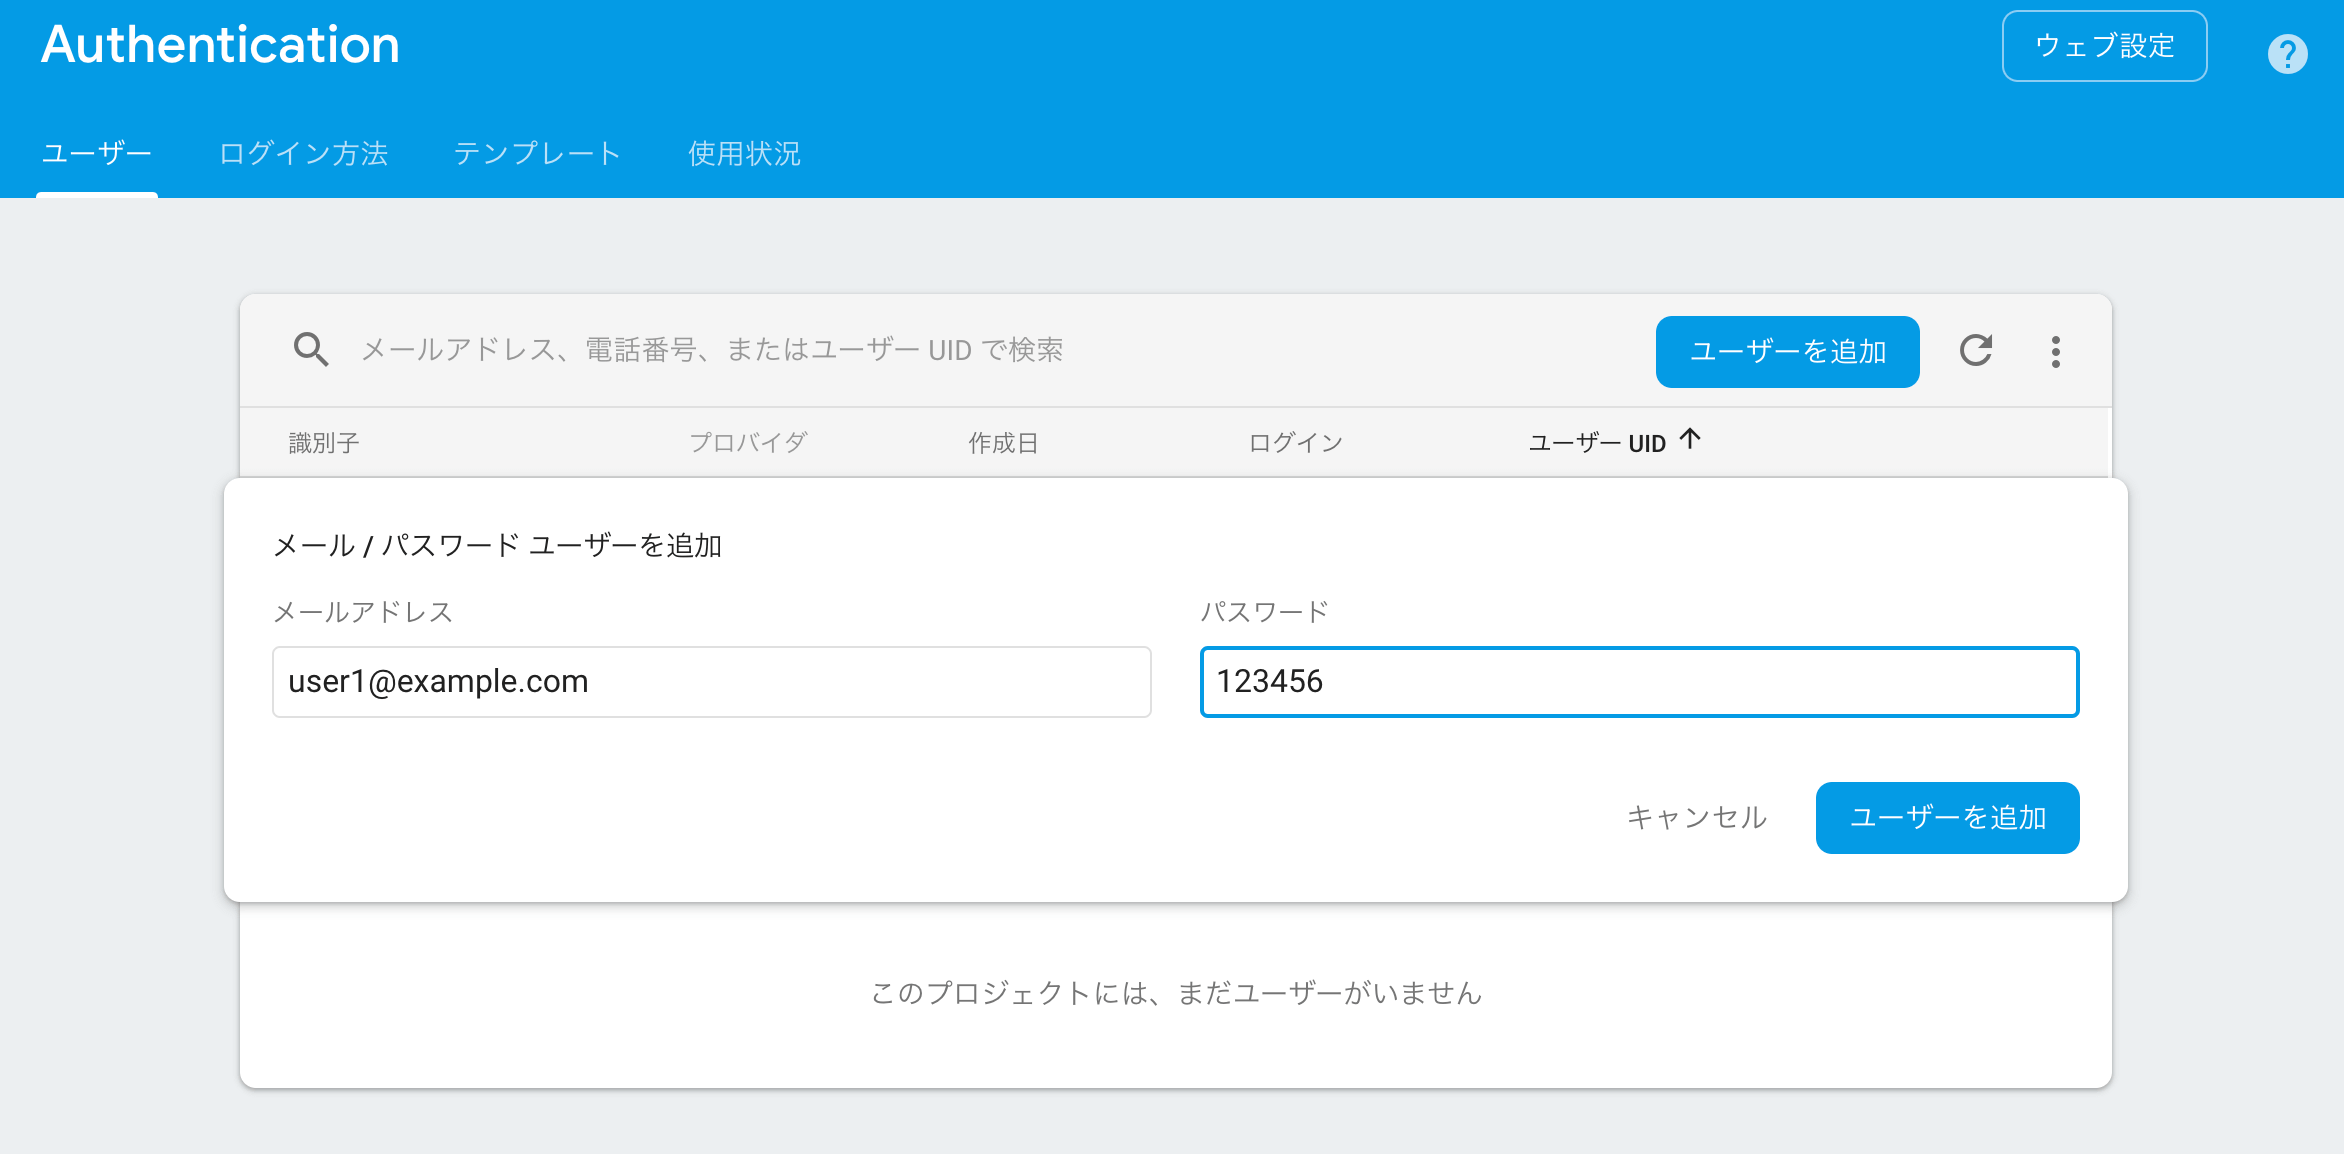
ファイルをアップロードする
[Storage] の [ファイル] タブを選択し、 [フォルダ作成] ボタンをクリックして images フォルダを作成します。
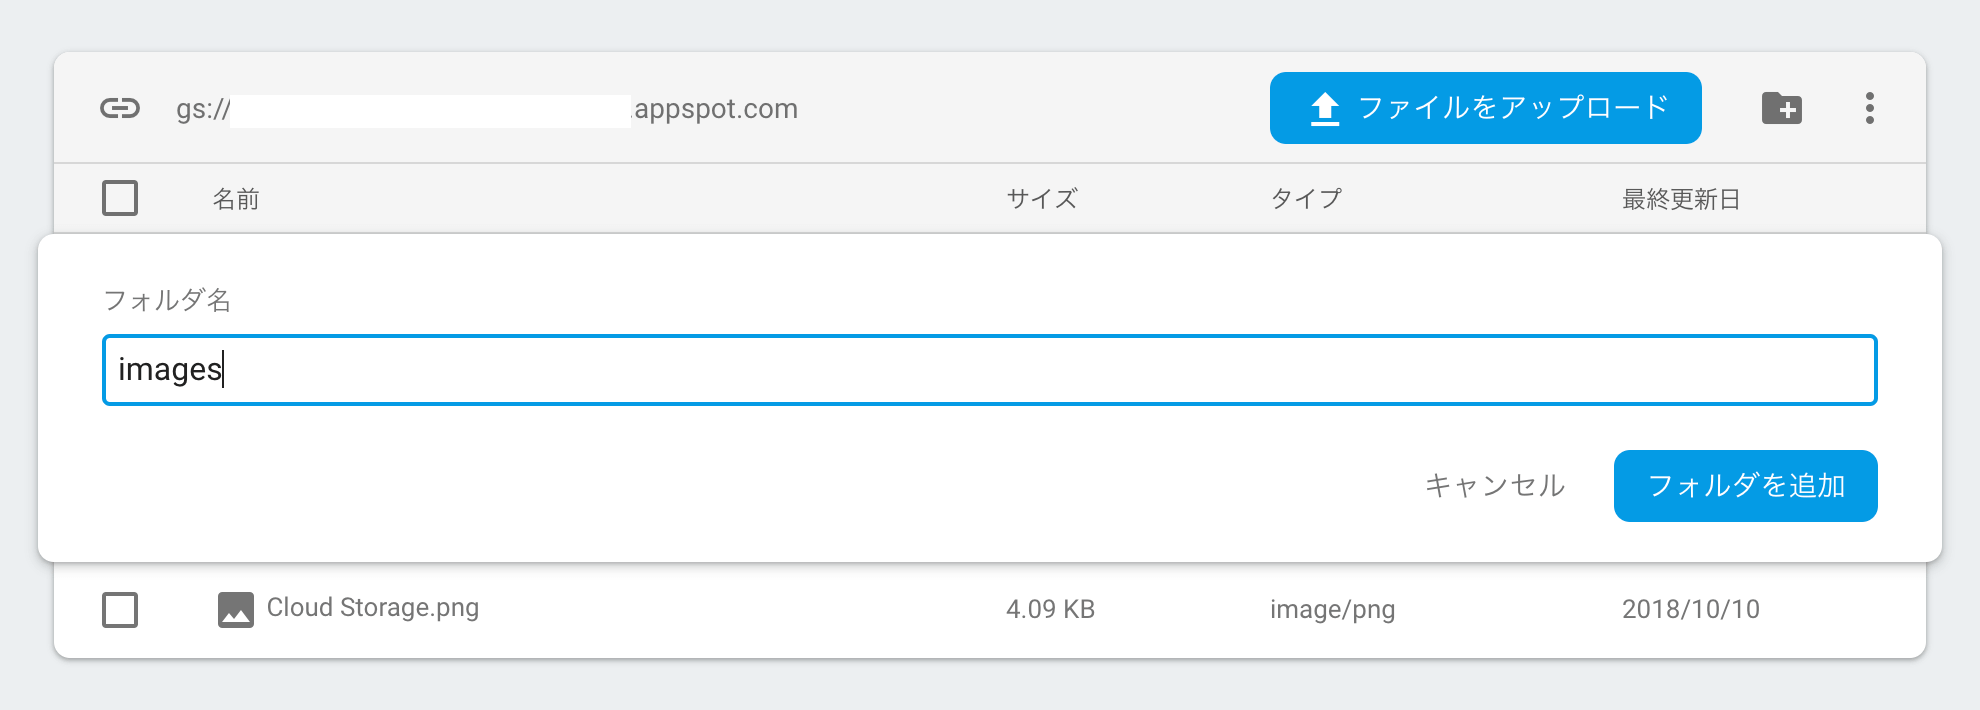
任意の2つのファイルを用意し、ファイルをアップロードします。

ルールを設定する
[ファイル] タブを選択し、 以下の内容でセキュリティルールを作成します。
限定公開画像には Firebase Authentication で作成したユーザを指定します。
service firebase.storage {
  match /b/{bucket}/o {
    match /images {
      // 公開画像
      match /CloudFirestore.png {
        allow read;
      }
      // 限定画像
      match /FirebaseAuthentication.png {
        allow read: if request.auth.uid == "user1@example.com";
      }
    }

    match /{allPaths=**} {
      allow read, write: if request.auth != null;
    }
  }
}
HTMLとJavascriptを修正する
画像を表示する index.html とサインイン画面の sine-in.html ファイルをそれぞれ次の内容で作成します。
それぞれのファイルには Firebase Authentication による認証処理が含まれます。
認証処理の詳細は、こちらの記事を参考にしてください。
index.html
index.html は画像を表示するため、 Storage に保存されているファイルの URL を取得します。
ファイル URL の取得には、 Storage オブジェクトのリファレンスから getDownloadURL() メソッドを使って取得できます。
<!DOCTYPE html>
<html>
  <head>
    <meta charset="utf-8">
    <meta name="viewport" content="width=device-width, initial-scale=1">
    <title>Welcome to Firebase Hosting</title>
    <script defer src="/__/firebase/5.3.1/firebase-app.js"></script>
    <script defer src="/__/firebase/5.3.1/firebase-storage.js"></script>
    <script defer src="/__/firebase/5.3.1/firebase-auth.js"></script>
    <script defer src="/__/firebase/init.js"></script>
    <style>
      .image{
        border: 1px solid black;
        width: 128px;
        height: 128px;
        background: no-repeat;
      }
    </style>
  </head>
  <body>
    <p>Hello, Firebase Strage!</p>
    <a href="sine-in.html">Sine in</a>
    <input type="button" id="sineout" value="Sine out">
    <ul>
      <li id="bucket">ここにバケット名が表示されます</li>
      <li id="filename1">Firestore</li>
      <li id="filename2">FirebaseAuthentication</li>
    </ul>
    <div id="imageFirestore" class="image"></div>
    <div id="imageFirebaseAuthentication" class="image"></div>


<script src="https://www.gstatic.com/firebasejs/5.5.3/firebase.js"></script>
<script>
  // Initialize Firebase
  var config = {
    apiKey: "API_KEY",
    authDomain: "YOUR_PROJECT_ID.firebaseapp.com",
    databaseURL: "https://YOUR_PROJECT_ID.firebaseio.com",
    projectId: "YOUR_PROJECT_ID",
    storageBucket: "YOUR_PROJECT_ID.appspot.com",
    messagingSenderId: "YOUR_SENDER_ID"
  };
  firebase.initializeApp(config);
</script>

    <script>

      var buttonSineOut = document.getElementById("sineout");
      var sineout = function(){
        firebase.auth().signOut().then(function() {
            console.log("Signed out.");
        });
      };
      buttonSineOut.addEventListener("click", sineout);

      document.addEventListener('DOMContentLoaded', function() {
        try {
          var app = firebase.app();
          var storage = firebase.storage();
          var storageRef = storage.ref();
          document.getElementById('bucket').innerHTML = 'Bucket: ' + storageRef.bucket;
          var imagesRef = storageRef.child('images');
          var imgFirestoreRef = imagesRef.child('CloudFirestore.png');
          var imgFirebaseAuthRef = imagesRef.child('FirebaseAuthentication.png');
          // ファイルのURLを取得する
          imgFirestoreRef.getDownloadURL().then(function(url){
            var image = document.getElementById("imageFirestore");
            image.style.backgroundImage = "url("+url+")";
            document.getElementById('filename1').innerHTML = '<a href="' + url + '">' + imgFirestoreRef.name + '</a>';
          }).catch(function(error) {
            document.getElementById('filename2').innerHTML = error.message;
            console.log(error);
          });

          // ファイルのURLを取得する
          imgFirebaseAuthRef.getDownloadURL().then(function(url){
            var image = document.getElementById("imageFirebaseAuthentication");
            image.style.backgroundImage = "url("+url+")";
            document.getElementById('filename2').innerHTML = '<a href="' + url + '">' + imgFirebaseAuthRef.name + '</a>';
          }).catch(function(error) {
            document.getElementById('filename2').innerHTML = error.message;
            console.log(error);
          });
        } catch (e) {
          console.error(e);
          document.getElementById('load').innerHTML = 'Error loading the Firebase SDK, check the console.';
        }
      });
    </script>
  </body>
</html>
sine-in.html
<!DOCTYPE html>
<html>
  <head>
    <meta charset="utf-8">
    <meta name="viewport" content="width=device-width, initial-scale=1">
    <title>Welcome to Firebase Hosting</title>
    <script defer src="/__/firebase/5.3.1/firebase-app.js"></script>
    <script defer src="/__/firebase/5.3.1/firebase-auth.js"></script>
    <script src="https://cdn.firebase.com/libs/firebaseui/3.1.1/firebaseui.js"></script>
    <link type="text/css" rel="stylesheet" href="https://cdn.firebase.com/libs/firebaseui/3.1.1/firebaseui.css" />
    <script defer src="/__/firebase/init.js"></script>
  </head>
  <body>
    <p>Sine in</p>
    <div id="firebaseui-auth-container"></div>
    <div id="loader">Loading...</div>
<script src="https://www.gstatic.com/firebasejs/5.5.3/firebase.js"></script>
<script>
  // Initialize Firebase
  var config = {
    apiKey: "API_KEY",
    authDomain: "YOUR_PROJECT_ID.firebaseapp.com",
    databaseURL: "https://YOUR_PROJECT_ID.firebaseio.com",
    projectId: "YOUR_PROJECT_ID",
    storageBucket: "YOUR_PROJECT_ID.appspot.com",
    messagingSenderId: "YOUR_SENDER_ID"
  };
  firebase.initializeApp(config);
</script>

    <script>
        var ui = new firebaseui.auth.AuthUI(firebase.auth());

        var uiConfig = {
          callbacks: {
            signInSuccessWithAuthResult: function(authResult, redirectUrl) {
              return true;
            },
            uiShown: function() {
              document.getElementById('loader').style.display = 'none';
            }
          },
          signInFlow: 'popup',
          signInSuccessUrl: './index.html',
          signInOptions: [
            firebase.auth.EmailAuthProvider.PROVIDER_ID,
          ],
        };
        ui.start('#firebaseui-auth-container', uiConfig);

    </script>
  </body>
</html>
デプロイする
修正が終わったら firebase deploy コマンドを実行して、デプロイします。
Web ページを確認する
ブラウザを更新すると、次のような画面が表示されるはずです。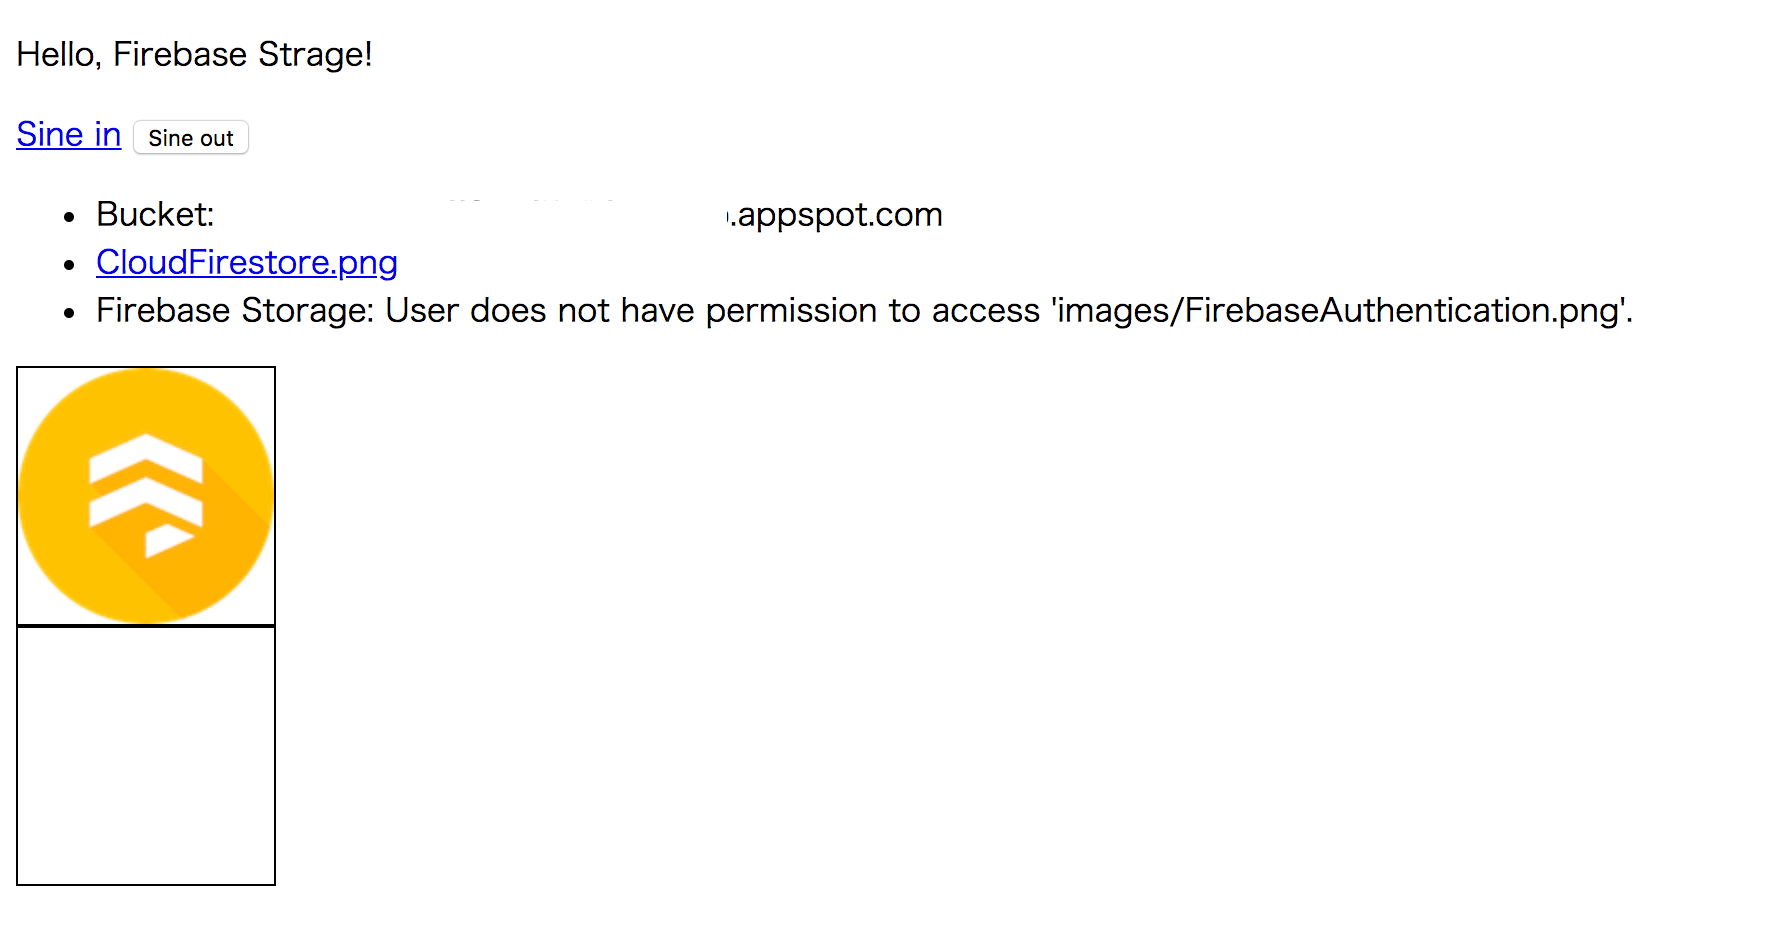
初期状態では、 CloudFirestore.png は公開画像のため表示されますが、 FirebaseAuthentication.png は限定公開画像のため表示されません。
[Sine in]リンクをクリックして、ログインします。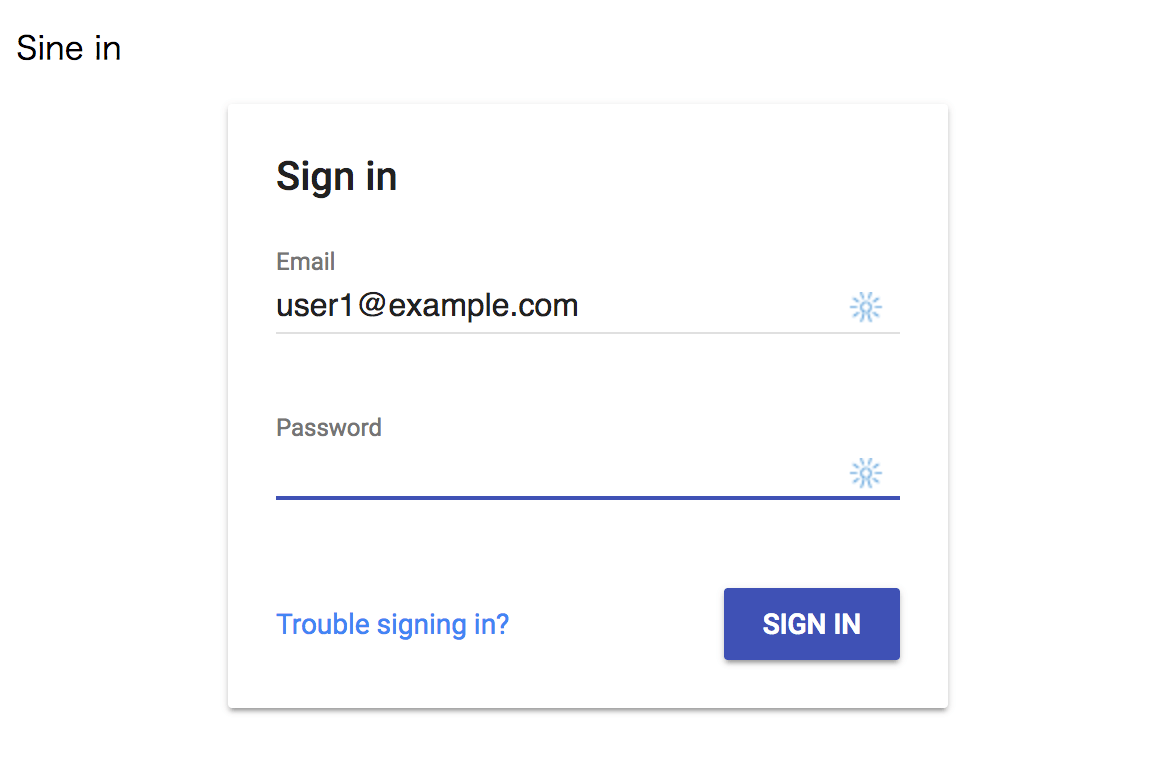
ログインが完了すると、 index.html が表示され今度は、FirebaseAuthentication.png が表示されているのが確認できます。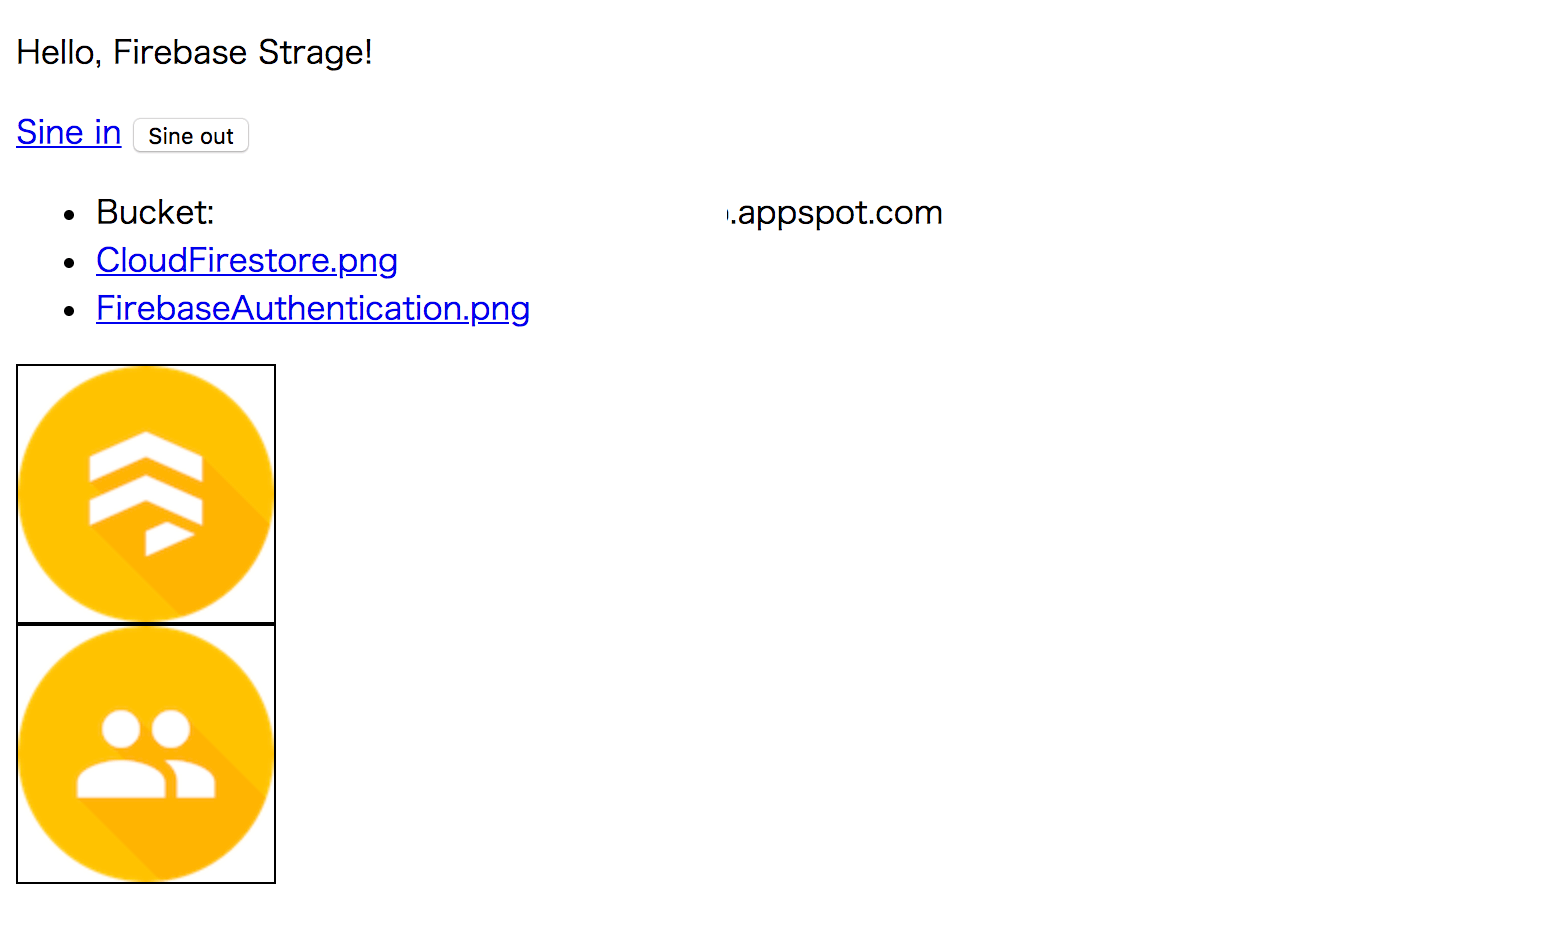
終わりに
いかがでしたか。 Cloud Storage for Firebase と Firebase Authentication を使えば簡単に、ユーザのアクセス制御ができることがわかったのではないでしょうか。
次回は Firebase の別の機能を使ってアプリケーション開発をしていく方法を説明します。
G-genは、Google Cloud のプレミアパートナーとして Google Cloud / Google Workspace の請求代行、システム構築から運用、生成 AI の導入に至るまで、企業のより良いクラウド活用に向けて伴走支援いたします。
Contactお問い合わせ

Google Cloud / Google Workspace導入に関するお問い合わせ


